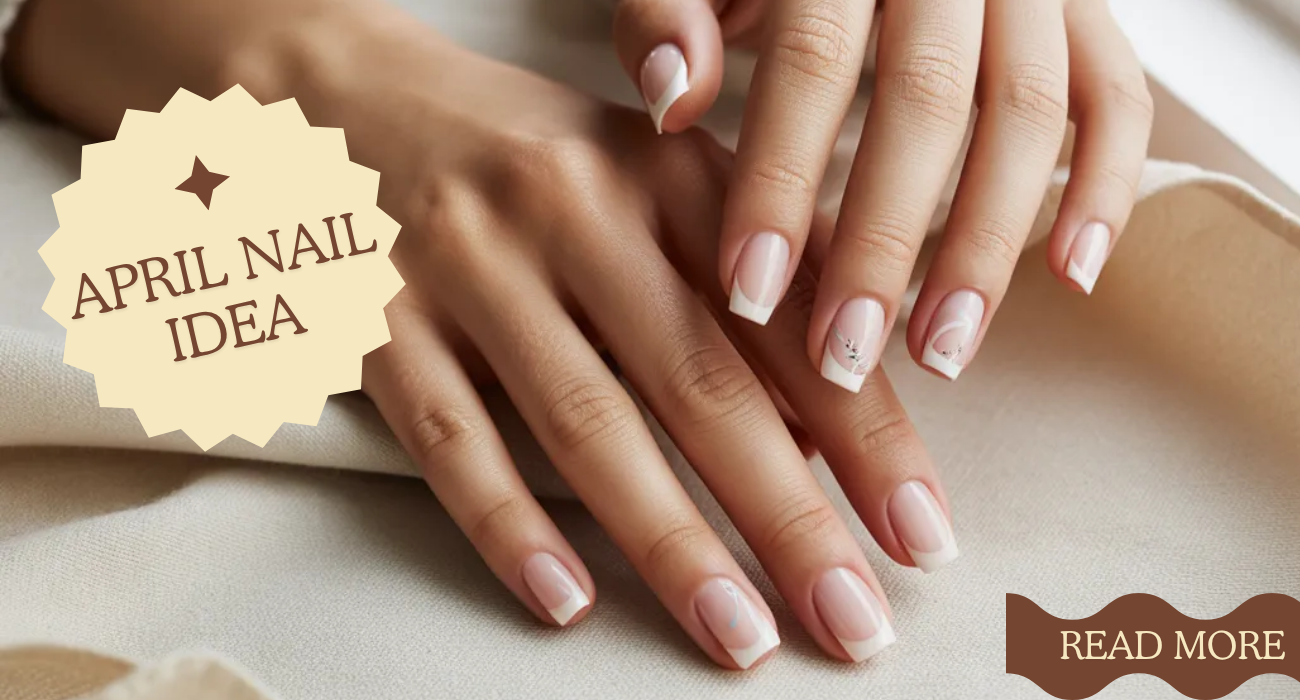
Every July 4th, I find myself standing in front of my nail polish collection, wondering how to make patriotic nails feel less like a craft project and more like something I’d actually want to wear. 4th of July nail designs have a reputation for being cute but predictable. And they don’t have to be.
This year, I went deep. I tested eight different looks over two weeks leading up to Independence Day, tried three base coats, and landed on styles that actually hold up at outdoor parties, boat trips, and rooftop barbecues without chipping by the end of the night.
The best part? You don’t need an expensive salon appointment. Most of these July nail ideas work perfectly with polish you probably already own — and a few of them look salon-level with zero nail art experience.
Why 4th of July Nail Designs Feel Dated (And How to Fix That)
Here’s what I noticed after scrolling through hundreds of patriotic nail designs: the ones that actually look good in photos aren’t the most “patriotic” ones. They’re the most intentional ones. Flag decals slapped onto a plain red base will look fine in the moment. But a negative-space design in navy with a single-star detail on the ring finger? That photographs beautifully and reads as fashion-forward, not costume-y.
The trick is treating the colour palette as a starting point, not a strict dress code. Red, white, and blue is a constraint, not a cage. When I stopped trying to cram all three colours on every nail and started building cohesive colour stories with them, everything changed. The shape your nail is makes a difference, too. If you’ve never thought about that, the guide on nail shapes that actually flatter your hands is worth reading before you commit to any art direction.
The three mistakes most people make
- Using three saturated shades on every finger (visual chaos, not patriotism)
- Going for ultra-thin stars and stripes that blur after one layer
- Skipping a matte or glossy topcoat that actually makes the design “read”
13 Fourth of July Nail Looks I’d Actually Wear
These are the designs I tested, vetted, and kept coming back to. Some are simple enough for a lazy Sunday. Others take 20 minutes max, but it looks like you spent an hour.
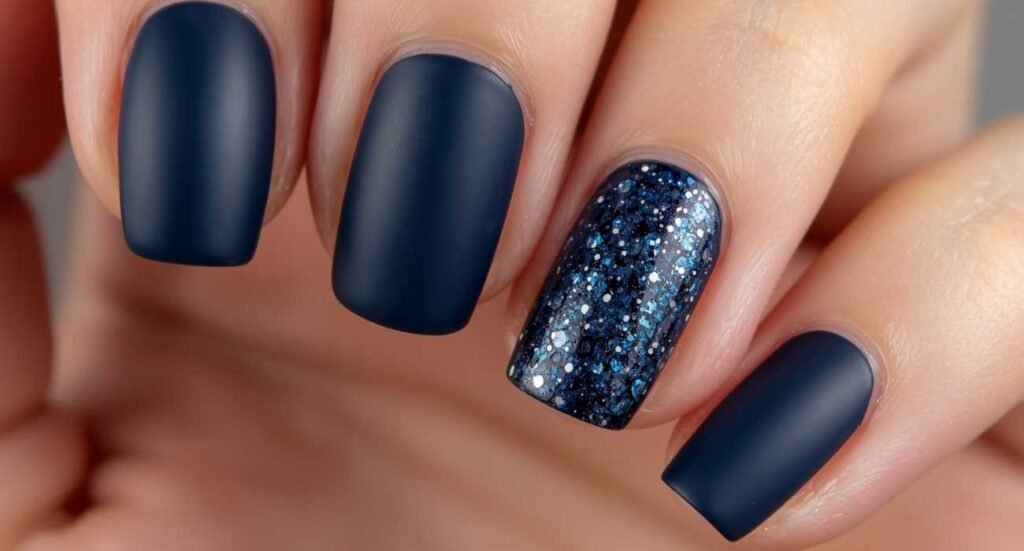
Design 01
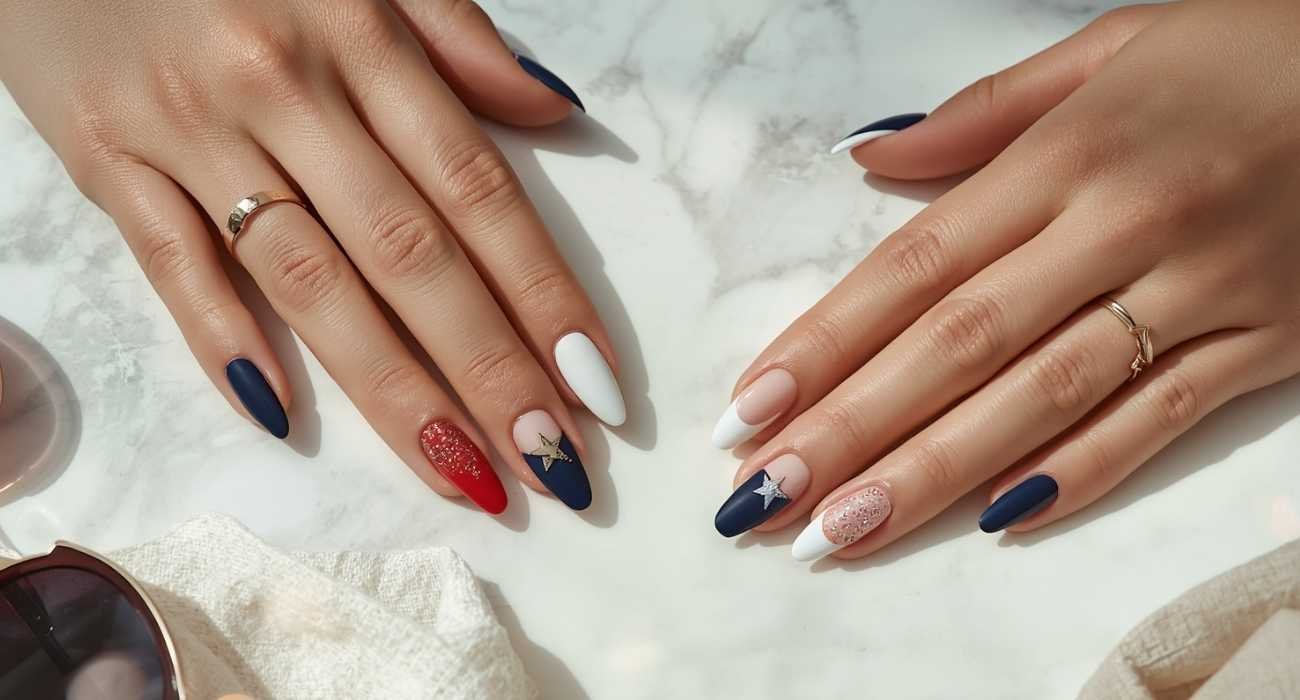
Navy Negative Space with a Single Gold Star
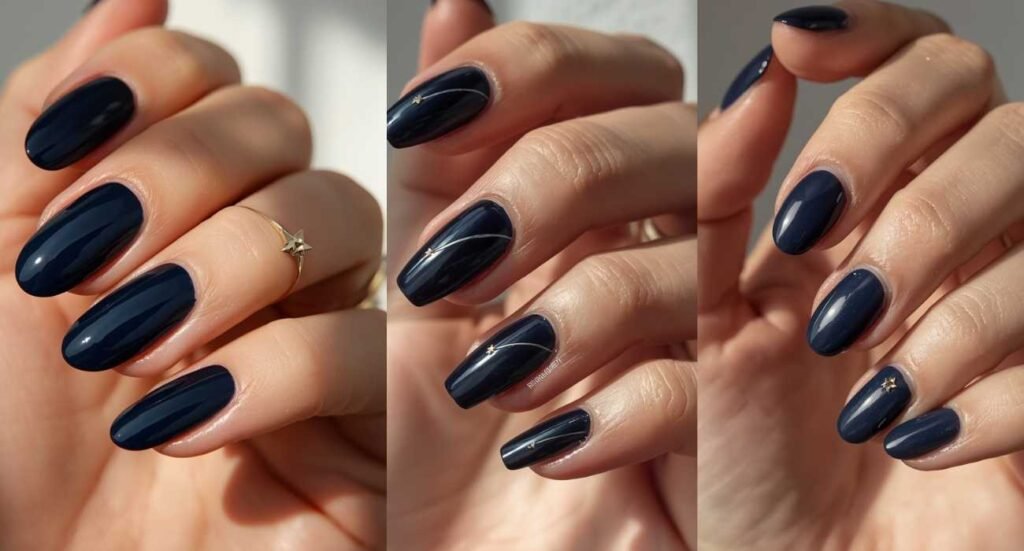
Paint nails in navy blue and leave a thin arc at the cuticle unpainted. Stamp one small gold star on your ring finger only. Understated. Genuinely chic. I got more compliments on this one than on any other design I tried.
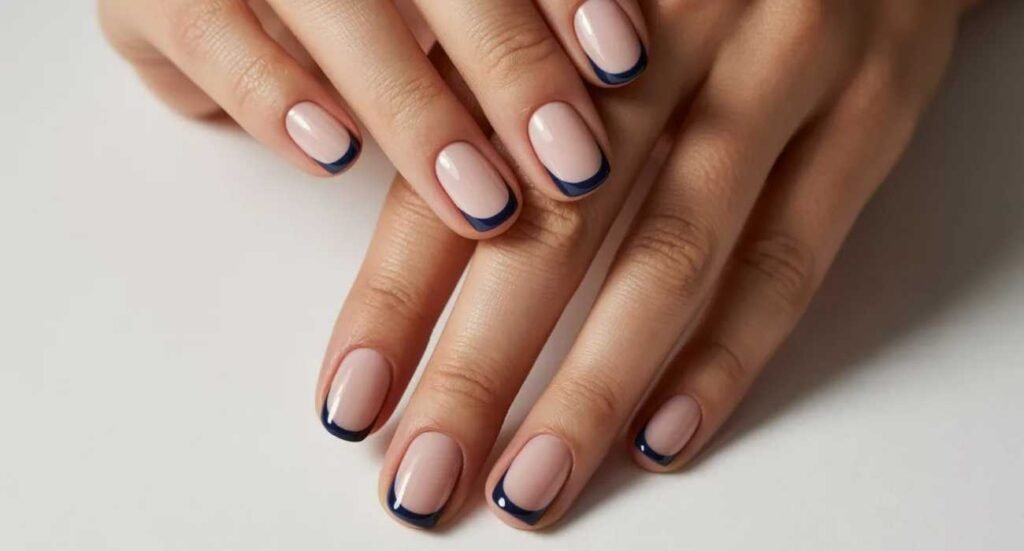
Design 02
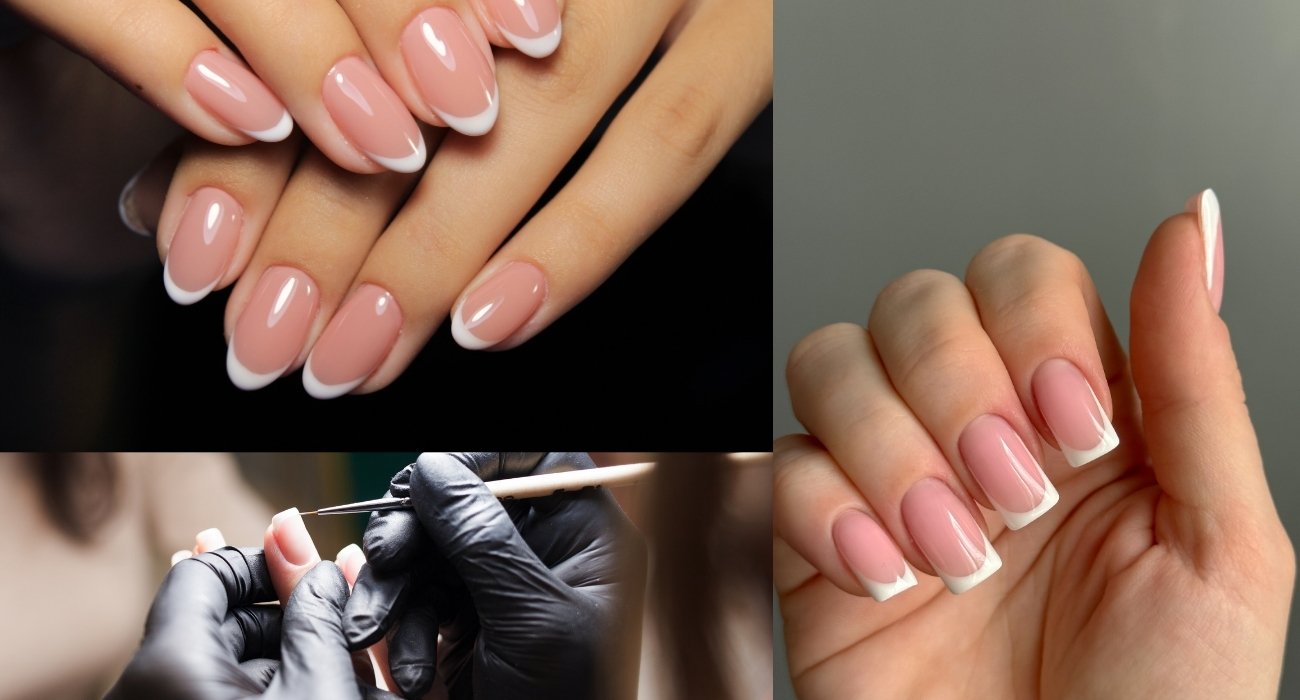
Barely-There Red French Tips
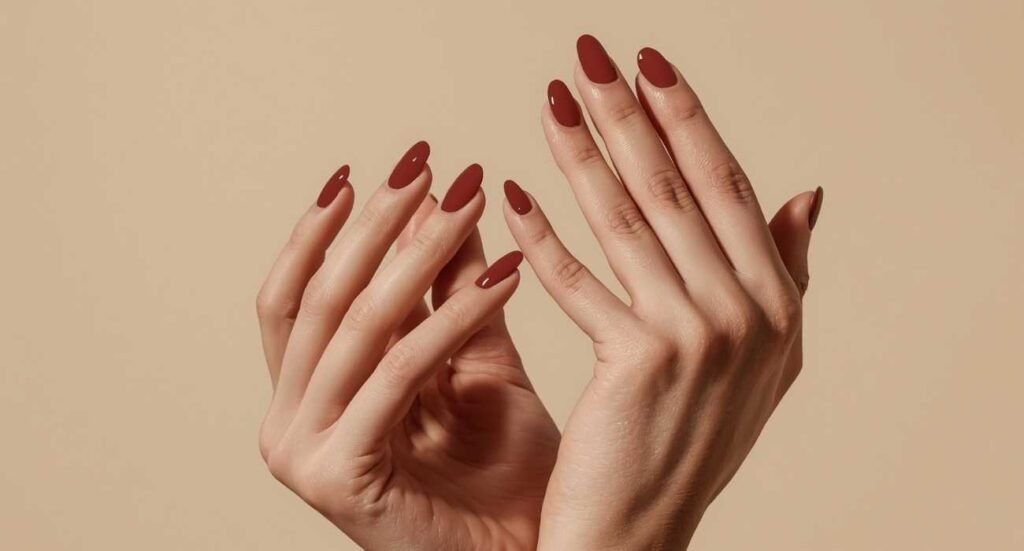
Classic French tip, but swap white for a deep brick red and widen the smile line slightly. Pairs with almost any outfit and doesn’t scream “July 4th” in a way that feels limiting. Works especially well on almond- or oval-shaped objects.
Design 03
White Chrome with Red and Blue Foil Accents
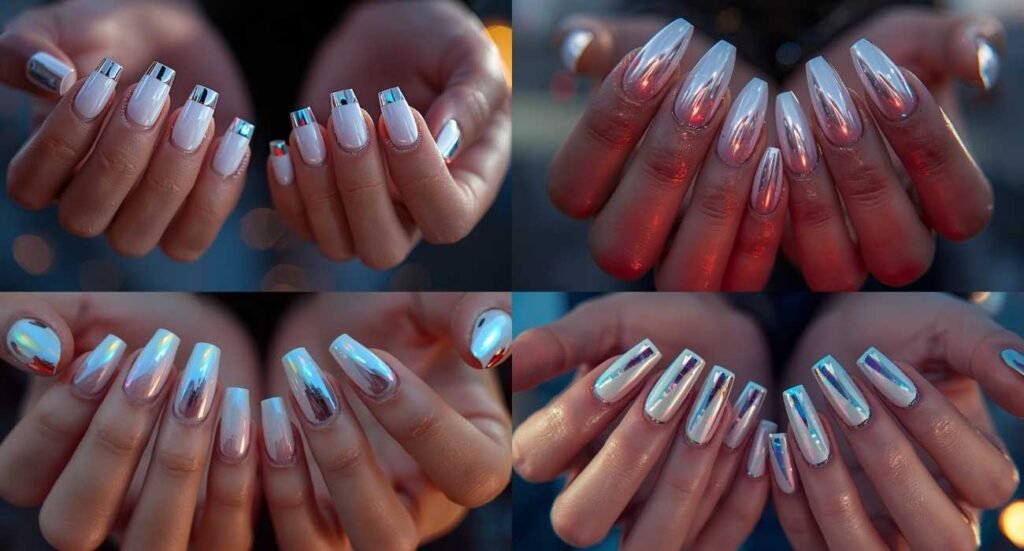
A chrome white base with tiny red and blue foil triangles near the tip gives you that futuristic firecracker look. I tested this at a rooftop party, and the way it caught the light was genuinely impressive. High impact, very low effort once you have the foil.
Design 04
Ombre Stars and Stripes
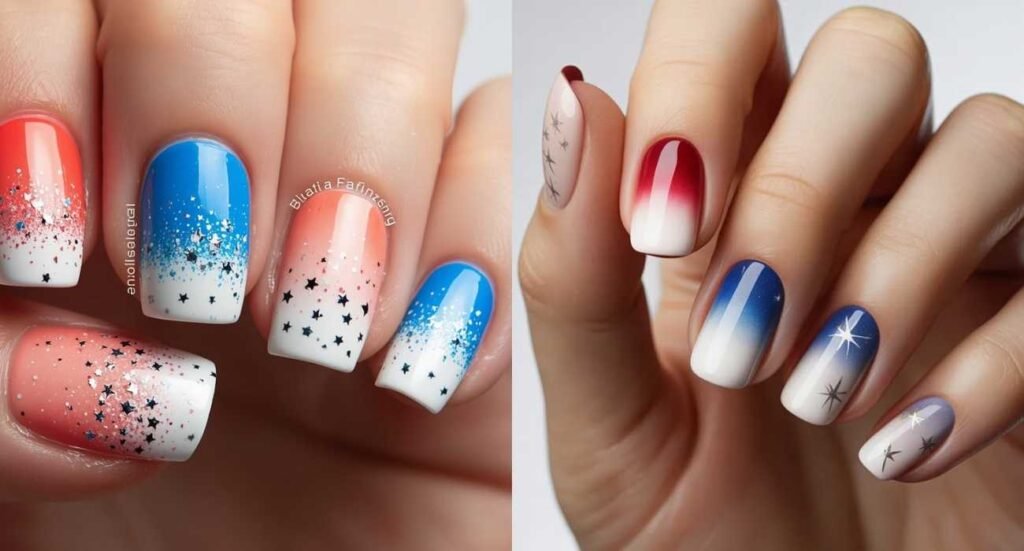
Sponge red-to-white on the index and middle fingers, blue-to-white on the ring and pinky, then stamp micro stars on a nude base for the thumb. The transition breaks up the visual noise and reads as editorial rather than kitschy.
Design 05
Matte Navy with Gloss Polka Dots
A matte navy base with a high-shine topcoat dotted on (use a dotting tool or the rounded end of a bobby pin) gives an easy texture play that photographs beautifully. The finish contrast does all the work.
Design 06
Minimalist Flag Accent Nail
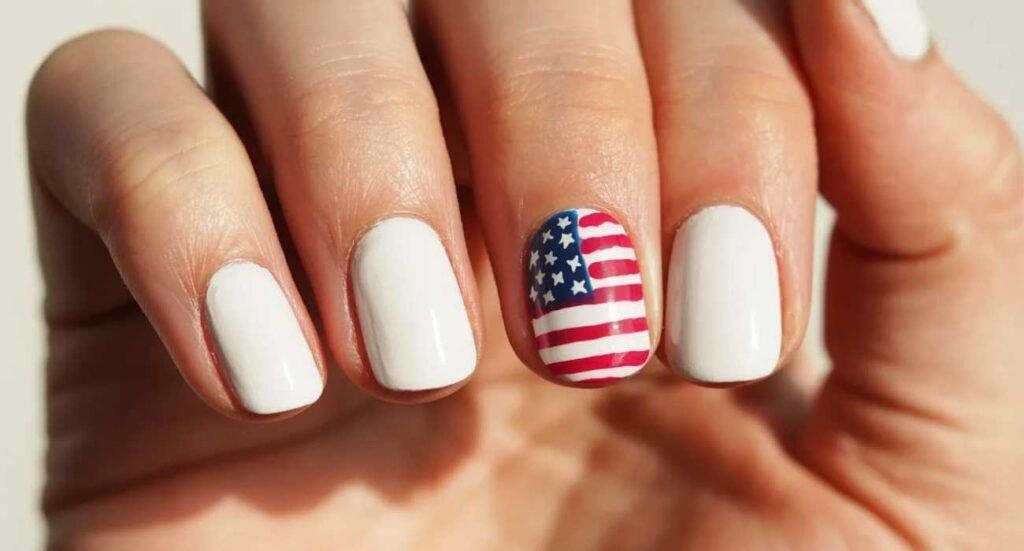
Four fingers in white, one finger in a hand-drawn mini American flag. Even imperfect versions look intentional. Use a thin nail art brush dipped in red and blue striping polish. I redid mine twice before it felt right, and it was worth it.
Design 07
Holographic Red Jelly
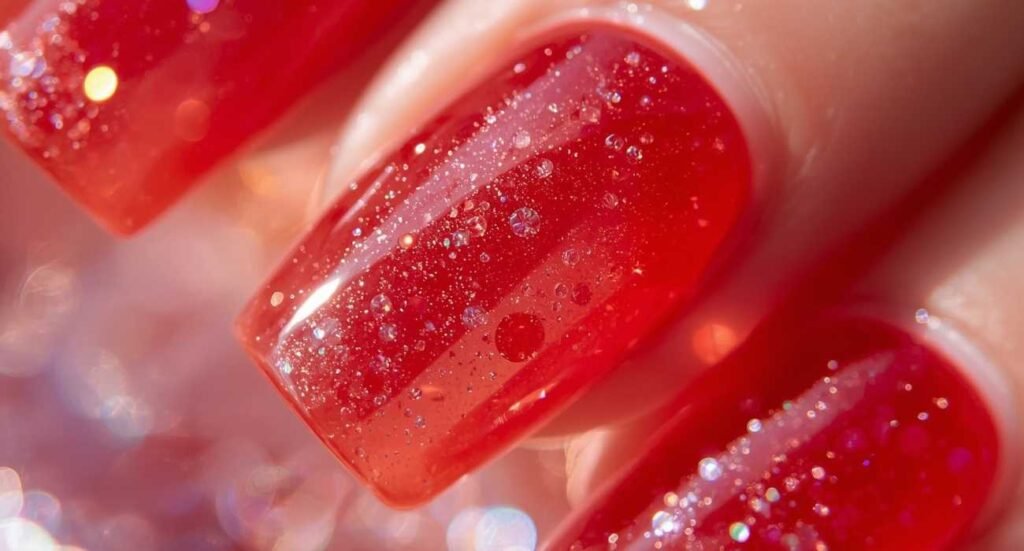
Jelly polishes sheer with a squished-candy look — in a holographic red give you that “fireworks in a bottle” finish. Two coats, no art needed. I wore this for four days straight without chips because the formula is incredible.
Design 08
Navy Half-Moon Base
A white or nude nail with a navy half-moon at the base (use a reinforcement sticker from the office supply aisle as a guide) is one of those designs that look like they took expertise but genuinely don’t. Very wearable into the week after the holiday, too.
Design 09
Red Glitter Gradient
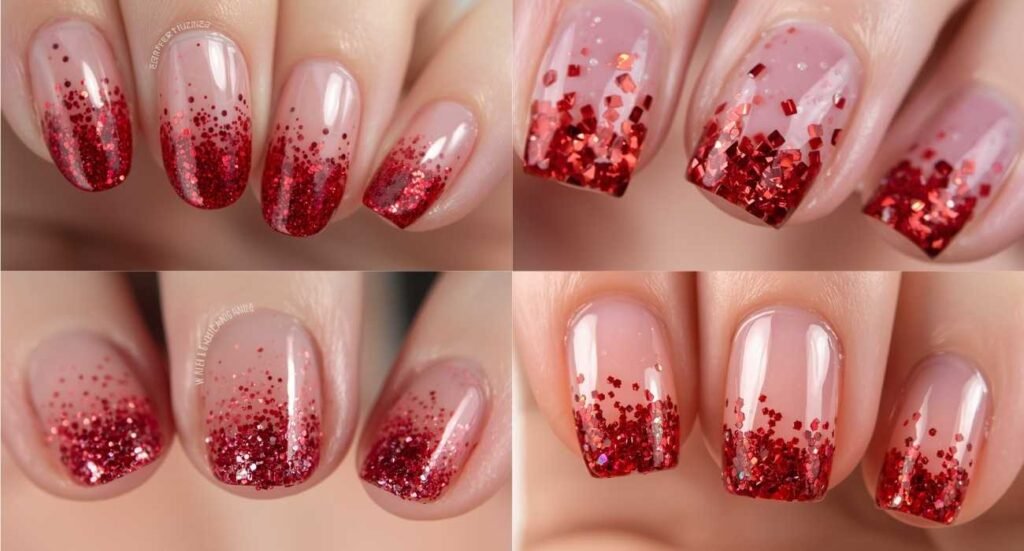
Start with a clear base and dab chunky red glitter polish near the tips, fading it toward the centre. Works on any length, any shape. If you want to grow your nails out before Independence Day, the tips on how to make nails grow fast can actually get you a noticeably longer canvas in 2 to 3 weeks.
Design 10
Blue and White Marble
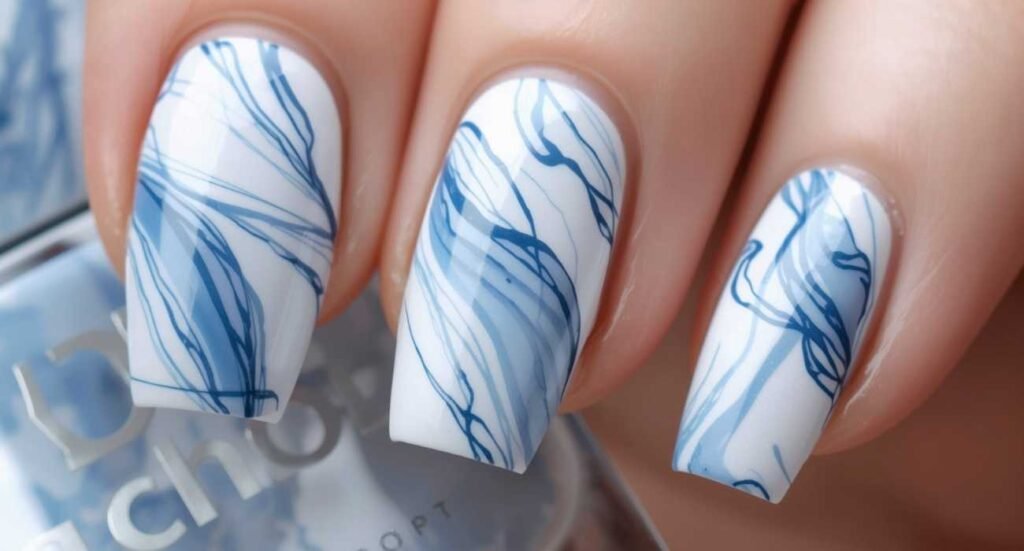
The “marble” look, using a thin brush dipped in blue polish on a white base, hits that cool, unexpected angle. It’s patriotic without being obvious. I have tried six different marble nail tutorials, and the key is to keep your lines thin and irregular, then seal with a high-gloss top coat immediately.
Design 11
Red, White, and Blue Colour Block
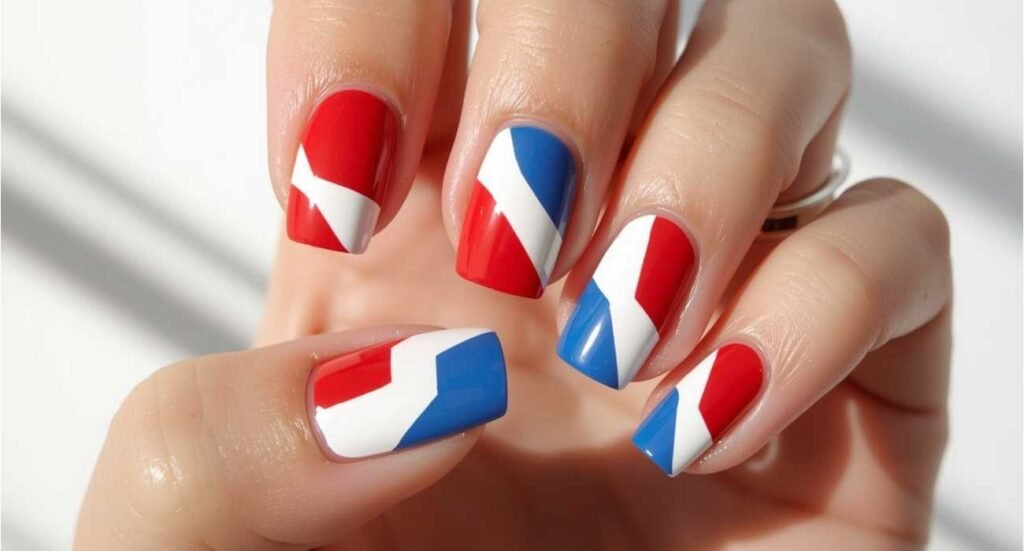
Divide each nail into thirds and paint each section a different colour using tape. No blending, just bold geometry. This one is polarising some people; I love it, some find it jarring. I personally love it with a linen outfit where the nails become the focal point.
Design 12
Subtle Firecracker Tips
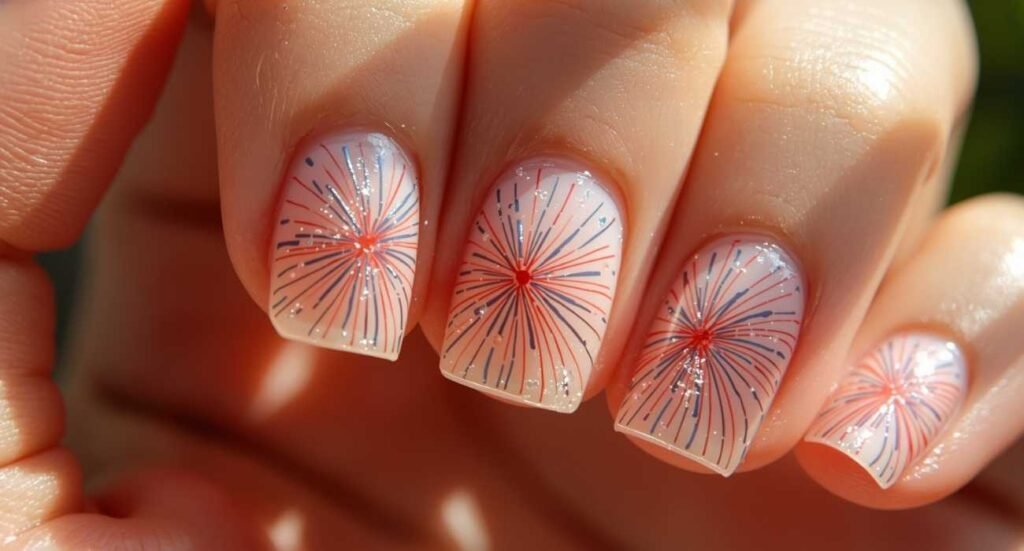
Thin streaks of red and blue, done freehand from the tip downward on a white or nude base, look like tiny firework bursts. Don’t overthink it. The less controlled it looks, the better.
Design 13
Gel-Style Freedom Nudes with a Star Stamp

Pair the trendiest nail nude of summer with a single star stamp in silver or white on the ring finger. This one travels well; you can wear it before and after the holiday without it reading as a costume. Check out current nail design trends to see how stamping has evolved this season.
Saving this for later? Pin this post so you have all 13 looks ready to go when July rolls around — your future self will thank you.
What I’ve Noticed About Patriotic Nail Art That Actually Holds Up
Two things consistently set July Fourth nail ideas that look incredible in person apart from those that just photograph okay: prep and topcoat. Those two steps account for about 80% of the result, and most people skip or rush at least one of them.
Prep makes everything last longer.
I started doing a thorough dehydration step before any polish (a quick swipe of 70% isopropyl alcohol on each nail) and noticed my Independence Day nail designs were lasting through cookouts, pool days, and dishwashing without peeling. That single habit changed my relationship with doing my own nails.
Two topcoat layers, always
I seal every nail art design with one layer of topcoat immediately after finishing, then a second layer after an hour. The difference in chip resistance is measurable. After adding this step consistently, I stopped having any design cracks or peeling for four to five days, even in summer heat.
For anything involving red polish (almost inevitable on July 4th), a ridge-filling base coat prevents the staining that turns your white and nude nails pink. I learned this the hard way after one particularly gorgeous red ombre look left my natural nail visibly pink for three days. If you’re working with makeup around the same time, the summer makeup tips that pair best with summer nail looks are worth bookmarking, too.
My Exact 4th of July Nail Routine
This is the exact process I use to get a salon-looking result at home in about 30 minutes, start to finish.
Daily (Leading Up)
- Apply cuticle oil every morning, massaging it in for 30 seconds.
- Moisturise hands after washing. Skip this, and your polish peels faster.
- Avoid picking at or peeling any existing polish.
- Keep nails filed to your chosen shape to avoid snags.
Application Day
- Wipe nails with alcohol to remove all oil and residue.
- Apply a ridge-filling or bonding base coat, wait 3 full minutes.
- Apply the first colour coat thinly, let it dry until just tacky.
- Add art, decals, or stamps on the accent nail only.
- Topcoat immediately, then a second layer one hour later
The weekly step I’d add, if you have time: a quick file and cuticle push-back every 5 to 7 days keeps your nails looking fresh and your polish edges crisp, even on day 8 or 9 of wear.
Products Worth Knowing for These July Nail Ideas
I’ve spent a lot on nail supplies over the years, mostly wasted money, until I narrowed it down to the things that actually move the needle.
The OPI Nail Envy base coat is the one change that made every design I did look more professional. It fills ridges so the colour sits flat, and it adds a bonding layer that keeps everything locked in. I’ve tried cheaper versions, and nothing compares. After switching to this, I stopped my red polish from looking streaky on the first coat.
The Seche Vite topcoat is divisive because it shrinks slightly if you apply it too close to the edge, but once you learn to apply it just a millimetre from the sidewall, it gives the most mirror-like finish I’ve found in a non-gel formula. My nails held up for six days at a beach trip without any visible tip wear.
For the outfits that’ll sit alongside your nails, the summer 2026 fashion trends offer many colour directions that pair naturally with patriotic palettes. Navy linens, white crochet, and red sundresses all photograph beautifully alongside the nail designs above.
What Actually Worked: Real Results From Testing These Looks
After testing eight designs over two weeks with different prep methods, the looks that included a dehydrating step and a bonding base coat lasted an average of 5 to 6 days with zero chips. Without those steps, I was seeing tip wear by day 3. The difference wasn’t subtle.
The three designs that received the most real-world compliments were Navy Negative Space (design 01), Red Glitter Gradient (design 09), and Matte Navy with Gloss Dots (design 05). All three share the restraint of not cramming every patriotic symbol into one look.
One mistake worth mentioning: I tried a full red-white-blue colour block design (design 11) without using tape guides, and it looked sloppy. Using painter’s tape cut into thin strips and pressing it firmly for 60 seconds before peeling made the second attempt look clean. If I’d skipped the tape step, that design would have been unwearable.
FAQ: 4th of July Nail Ideas
What are the easiest 4th of July nail designs for beginners?
The Red French Tip (design 02), Red Glitter Gradient (design 09), and Holographic Red Jelly (design 07) require no nail art tools or steady hands. They’re all solid-coverage or gradient looks that look intentional, even when applied quickly. The Gel-Style Freedom Nude with a stamp (design 13) is also very beginner-friendly since you’re just pressing a stamp.
How long do 4th of July nail designs last?
With proper prep (alcohol wipe, base coat) and a quality topcoat applied in two layers, most designs should last 5 to 7 days on regular nails. Gel polish versions can last up to 14 days. Summer heat and pool water accelerate edge lifting, so reapplying the topcoat on day 3 extends wear noticeably.
Can I do these designs on short nails?
Yes. Designs 01, 02, 07, and 10 actually look best on shorter nails, where the detail is more concentrated. Avoid intricate flag art on nails with a free edge shorter than 3mm; there simply isn’t enough surface area for the design to read. The half-moon design (08) is ideal for shorter nails.
What nail shape works best for patriotic nail art?
Oval and almond shapes give the most canvas for detailed nail art and tend to look more refined. Square tips work great for geometric colour-block designs. Coffin nails give maximum impact for ombre and gradient looks. If you’re deciding on a shape before your July 4th manicure, there’s a detailed breakdown of which nail shapes actually flatter your hands worth reviewing first.
How do I make red nail polish not stain my nails?
Always use a ridge-filling base coat underneath any red polish, even if you’re wearing multiple colour coats. The base coat creates a barrier between the pigment and the nail plate. If staining persists, soaking nails in a mixture of lemon juice and warm water for 5 minutes after removal helps neutralise the discolouration.
Patriotic nails don’t have to be predictable, and they don’t require any special talent. The designs above range from five minutes to twenty, from beginner-proof to slightly more involved, but all of them have one thing in common: they look like a choice, not an afterthought. Whether you lean into the classic red-white-and-blue or put your own minimal spin on the palette, the goal is nails that feel like part of your look, not an accessory you threw on for one day. If this gave you ideas for beyond July, the 2026 nail design trends running throughout the year are worth exploring next. Save this post before the long weekend sneaks up on you.